
Brother KR830 ribbing attachment was developed to convert a single-bed standard-gauge flat-bed knitting machine into a double-bed knitting setup. There is not specific information on when exactly these appeared on the market but very likely around the same time as the main bed.
Brother KR830 ribber features 200 needles, spaced 4.5 mm apart. It fits the majority of the Brother Knitting machines of the KH8XX series (specifically all punch-card knitting machines with model numbers KH820, KH821, KH830, KH831, KH836, KH840, KH851, KH860, KH864, KH868, KH871, KH880, KH881, KH890, KH891, KH892, KH893 and KH894) and KH9XX series (all electronic machines with model numbers KH900, KH910, KH920, KH930, KH940, KH950i, KH950e, KH965, KH965i and KH970). I personally tested one KR830 on KH840 and one on KH830. They are available in my store from time to time.
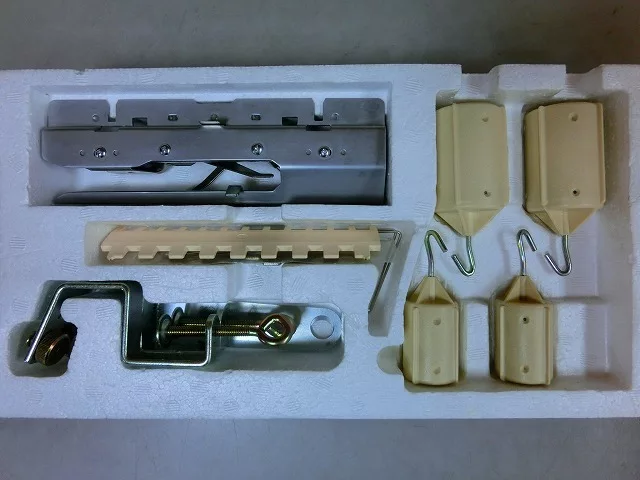
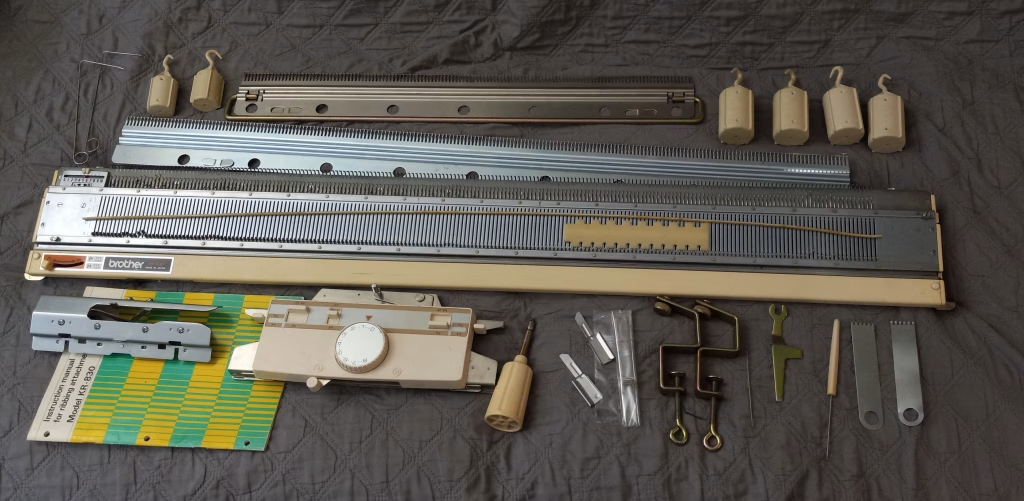
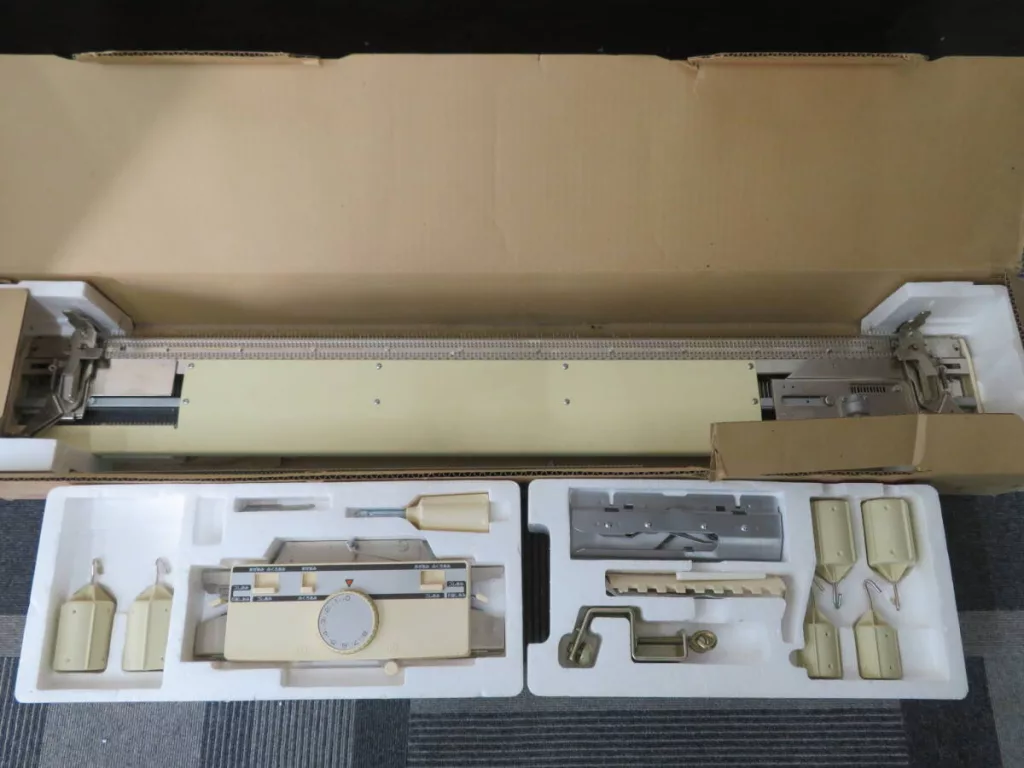
Typical assesories that the ribber comes with are the ribber carriage, left and right brackets, racking grip handle, connecting arm, end-stitch pressure (right and left), table clamps, long and short cast-on combs, large and small barrel weights, wire-loop type weight hangers (to attach on the end of the knitted panels), fine-knitting bar (a long plastic thin bar to knit with finer yarns), claw weight hangers (to attach to the knitted fabric anywhere on the panel), spanner (acts like a screwdriver and a wrench to adjust the distance between the ribber and the main beds), work hook, spare needles with the case, transfer needle (like a double-eye needle) and a 1/2 and 2/2 needle pusher.
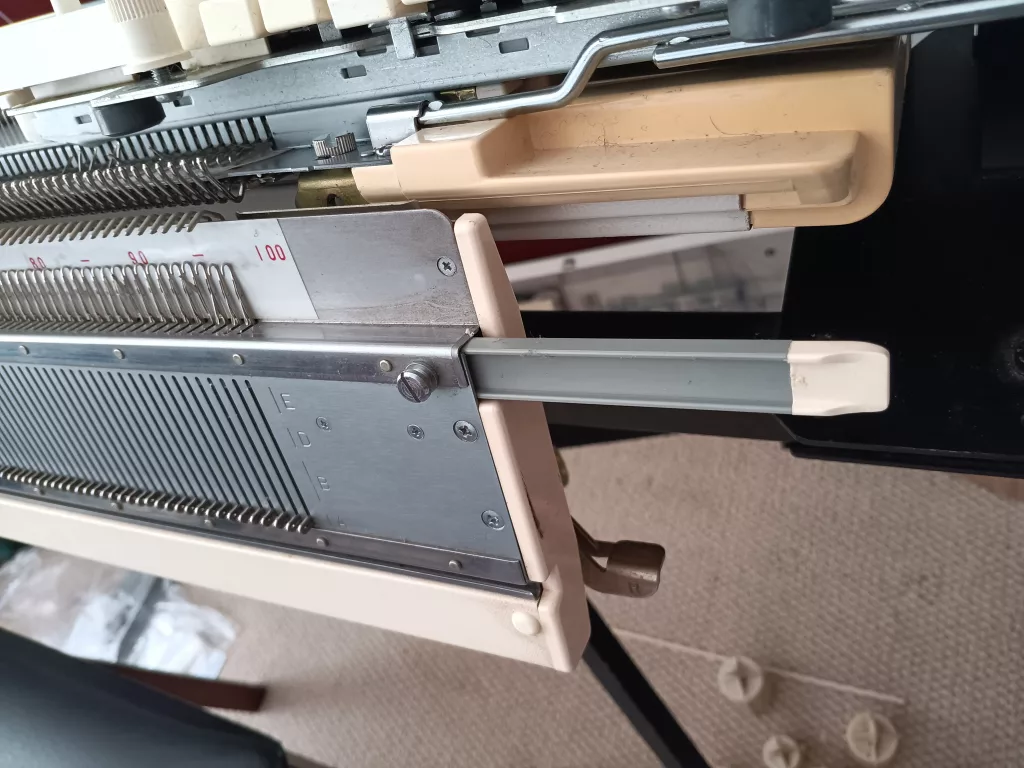
The retaining bar is inserted with the grooves facing you (the flat surface is pressed against the the needles).
Brother KR830 and KR850 are very similar but there still distinct differences. The slightly improved design of KR850 setting plates makes it very convenient to insert the ribber bed into the knitting machine bed. (On KR830 these brackets are not stand-alone and are part of the screws that are attached to the already-attached brackets). In fact, the “tongue” part of the side brackets for KR830 are wider and would not fit into the setting plates. I guess this is one of the ways to distinguish between the side brackets for these two ribbers. In fact, the “tongue” part of the side brackets for KR830 are wider and would not fit into the setting plates. I guess this is one of the ways to distinguish between the side brackets for these two ribbers.
Another advancement of KR850 over its older KR830 counterpart is that KR850 has a plating yarn feeder and a R carriage lock (it secures the main machine carriage to the main needle bed when the KR setting plates are inserted into the main needle bed so the knitter does not need to worry about removing these plats constantly).
Despite differences between Brother KR830 and KR850, Brother KR850 carriage definitely works with the KR830 ribber as described in my other blog post.
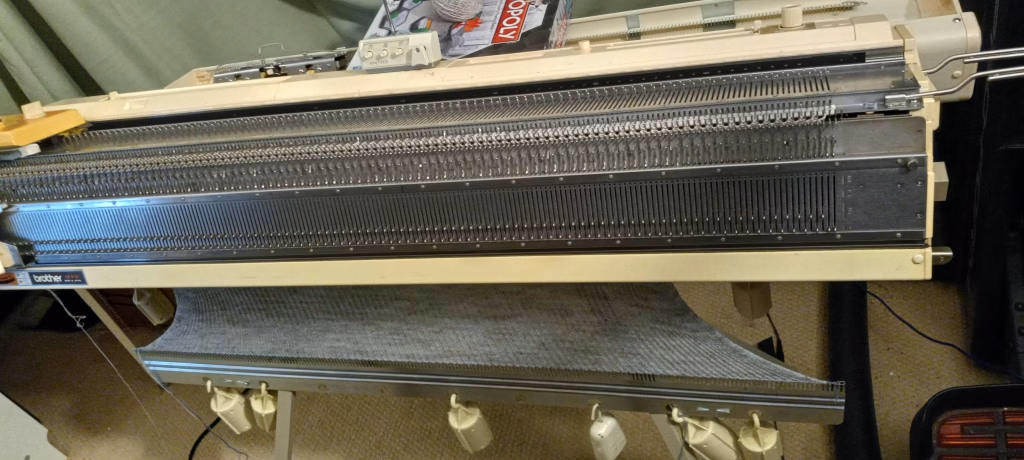
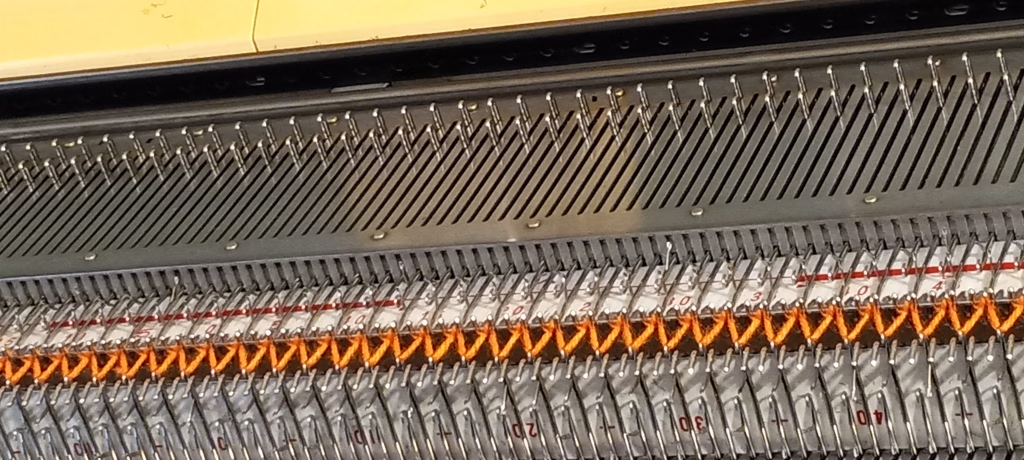
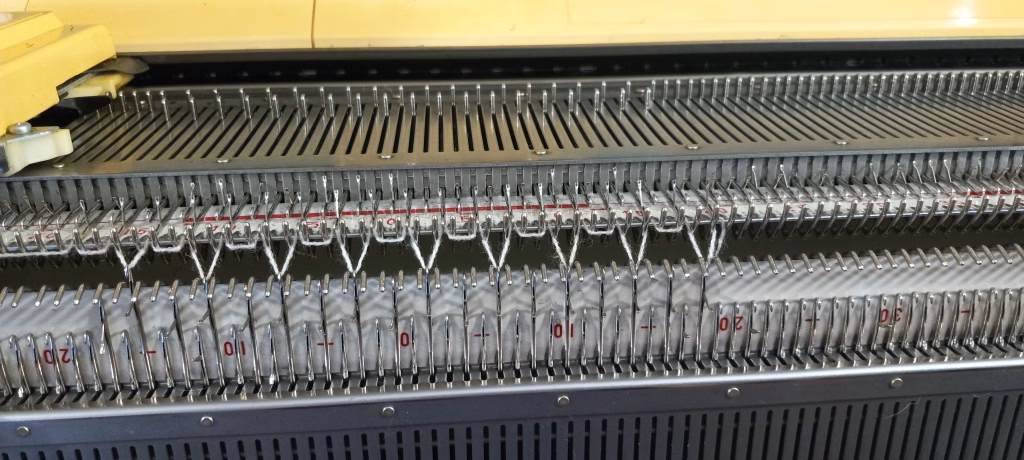
The most important thing in setting the ribber is the optimum distance between the main bed and the machine. Below is a picture is what you should get if the ribber is properly positioned relative to the main bed.
I typically follow a nice video on how to adjust the distance between the ribber and the main bed to get problem-free and drop-stitch-free panels and patterns.
If the distance is NOT adjusted properly, you will get missed stitches – something like I got (shown below). You will be puzzled why only every-other stitch formed on the ribber but the incorrect distance between the ribber and the machine will create all kinds of regularly-skipped stitches. The biggest problem is not even being able to notice the dropped stitches. It is extremely disappointing to find dropped stitches after you remove the fabric from the bed and cast-on comb.
It will work (in tandem with a knitting machine) with KRC830, KRC840, KRC 900, and KRC-1000E color changers.
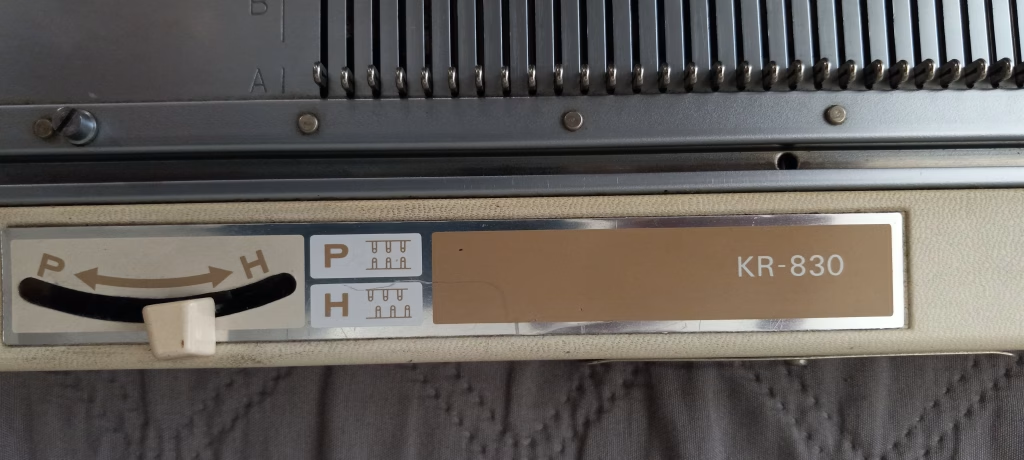
The ribber is capable of knitting a variety of ribbing patterns (2×2, 1×1, 5×5, full rib on all needles, English and fisherman’s ribs) and U-shape stockinet panel as well as round (without a seam) stockinet tube. Can create interesting tucking patterns. All is needed is to change the positions of different knobs and levers.
Besides KR830, the hero of this post, and its most popular counterpart, KR850, Brother released similar ribbing attachments like KR810, KR880, and KR900.
I had a chance to work with several different Brother KR830 ribbers so I can judge the pros and cons of this attachment.
Pros and Cons of Brother KR830 ribber:
PROS:
(+) Parts can easily be purchased on the new and used markets.
(+) Replacement needles can be purchased on a new market.
(+) Well-written instruction manual.
(+) Very straightforward carriage threading (with yarn) process. It is more tedious on earlier ribber models (like KR580).
(+) The racking lever allows to knit wavy-racking patterns.
(+) The retaining bar is a plastic bar (no sponge). So, just regular clearing is needed. No sponge to worry about.
(+) Unlike earlier models (KR5XX series), the connecting arm allows to movement of the main and ribbing carriage simultaneously. This tremendously decreases the movements required from the knitter as well as the possibility of making mistakes or problems with tension.
For all patterns, refer to the well-written manual.
CONS:
(-) The first initial adjustment of the distance between the main bed and the ribber might seem tedious. However, there are numerous resources on how to do it correctly.
(-) Dropped stitches are easy to miss while knitting.
(-) Brother KR830 is missing features available on later models of ribbing attachments (like lili buttons on KR850).
(-) Less friendly than later models on knitting the double-jacquard (doable but lots of manual manipulation of needles required).
(-) Plastic components of the KR830 ribber, including plastic parts on the carriage, end caps, and others are prone to discoloration due to exposure to sunlight even through the window. Thus, please cover your machine with a thick curtain or a towel to prevent further sun damage.
If you purchased this ribber in a rough shape, check my article on the steps I take while cleaning and servicing ribbers, especially those showing some rust.
If you have a well-serviced ribber, check the steps I take while testing the ribbers.
Having your main knitting machine accessories with a ribber will bring your knitting skills to the next level. Not only you will create beautiful ribbing on sleeves and necks but you can also knit wider panels and even socks. Just be open-minded because adding ribber also adds a level of complexity and a myriad of things to remember to do and to keep track of. But at the end of the day, it will only make you a better machine knitter.
Happy Knitting!